
 Ahmet Yüceler

The useOptimistic hook that ships with React 19 speeds up the user experience by updating the UI without waiting for the server's response. A short, solution-focused approach: I'll walk through it with code examples, explaining what each step does.
What Is It For?
- Problem: The user performs an action (say, adding a todo), and the UI freezes because of server latency.
- Solution: Update the UI "optimistically" right away, and roll back if something goes wrong. Instead of managing this manually with useState, you get automatic rollback.
Basic usage:
const [optimisticState, addOptimistic] = useOptimistic(
  initialState,  // Başlangıç verisi (örneğin todos listesi)
  (state, action) => {  // Güncelleme fonksiyonu: Yeni hali hesapla
    if (action.type === 'addTodo') {
      return [...state, action.newTodo];  // Listeye hemen ekle
    }
    return state;
  }
);- What does it do? optimisticState always reflects the latest state. When you call addOptimistic({ type: 'addTodo', newTodo }), the UI changes instantly, and if the server returns an error, it automatically reverts to the previous state.
Why Should You Use It?
- It makes the UI responsive: the user doesn't wait and gets instant feedback.
- Error handling is easy: if the server fails, the rollback is automatic.
- It integrates with Next.js: data stays in sync via Server Actions + revalidateTag.
Example: A Todo List App
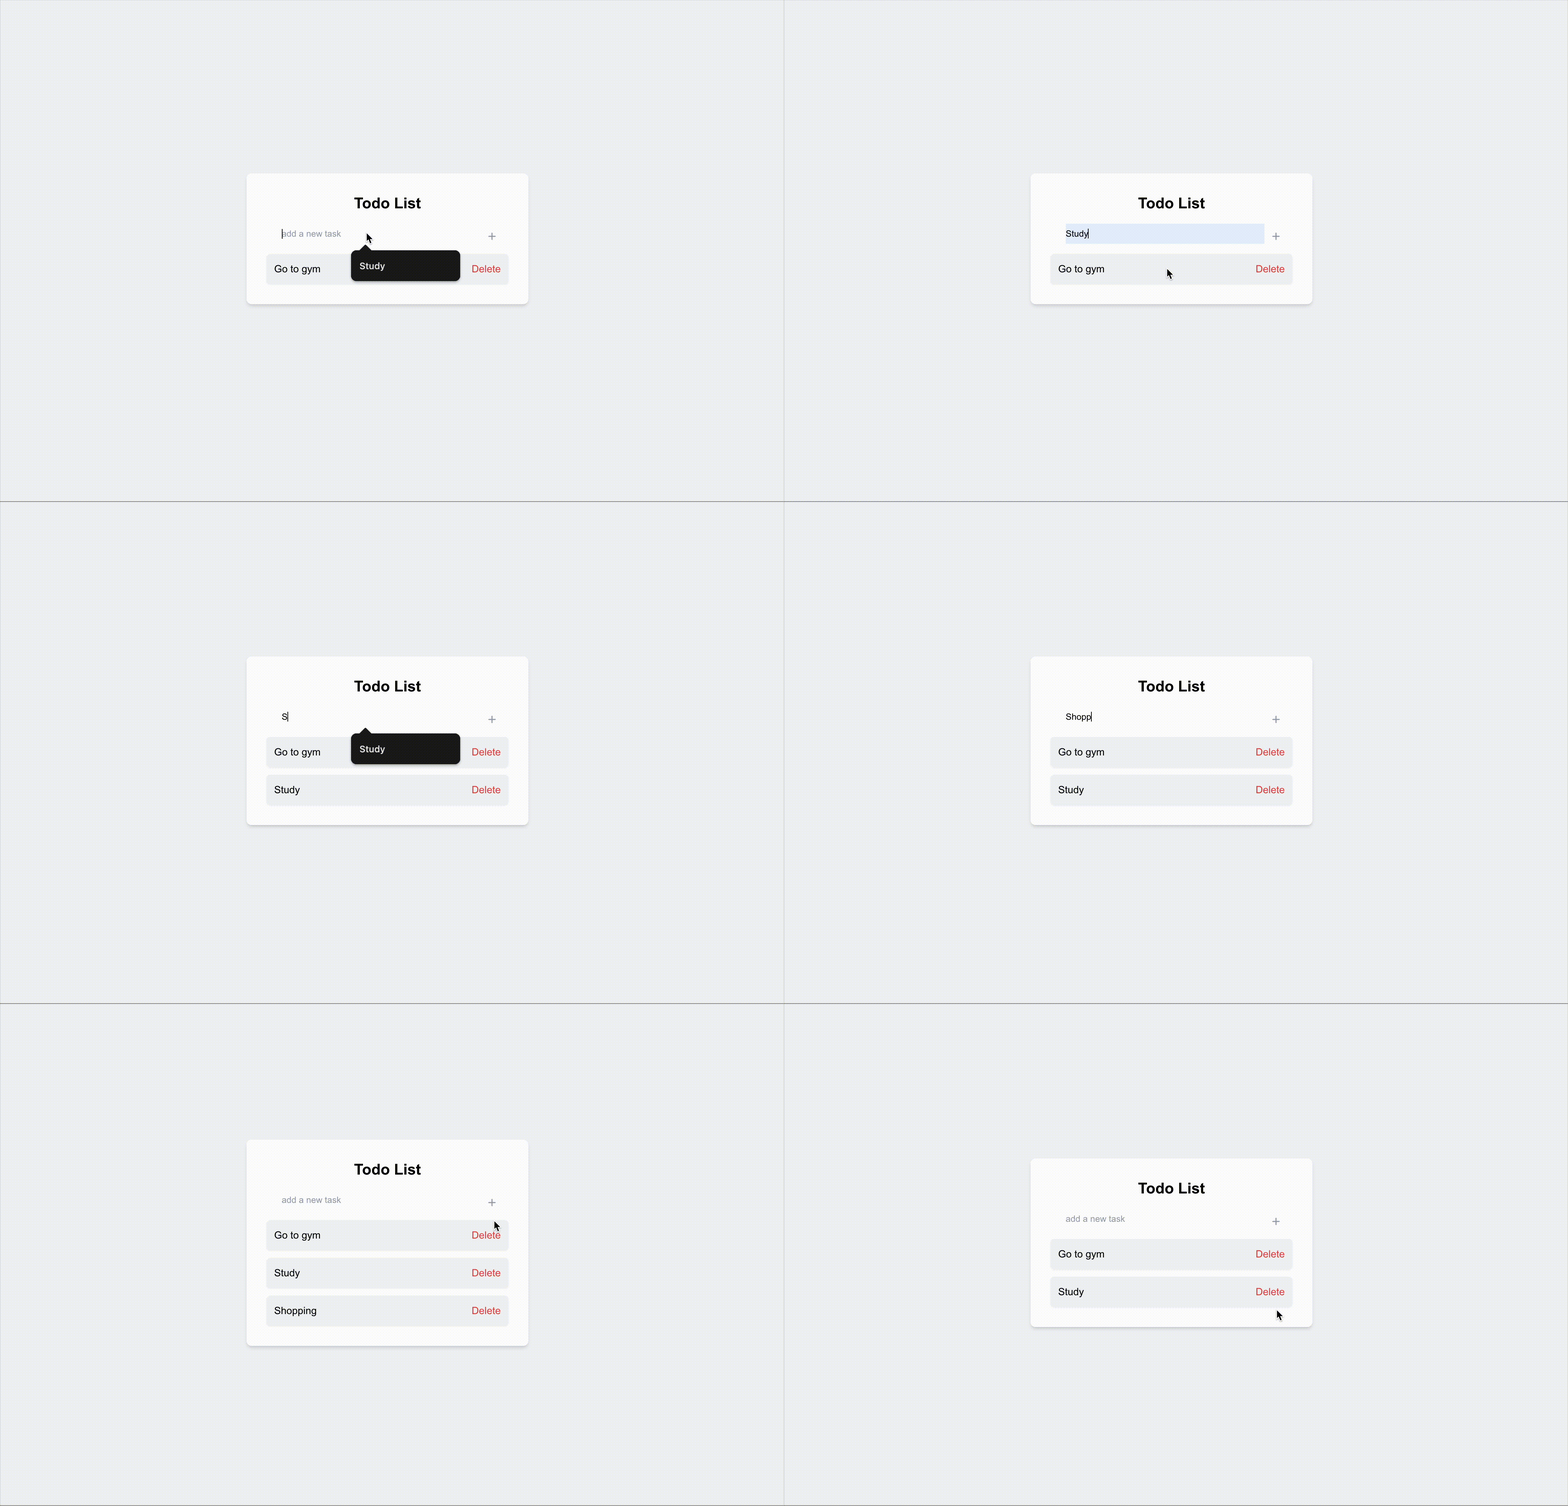
Let's build a todo app. We'll fetch todos from the server, add new ones, and update optimistically.
1. Page Component (page.jsx - Server Component):
import { getTodos } from '@/utils';
import TodoList from '@/components/TodoList';

export default async function TodoApp() {
  const todos = await getTodos();  // Sunucudan veriyi çek (cache'le)
  return (
    <div className="min-h-screen bg-gray-100 p-8">
      <h1 className="text-2xl font-bold mb-4">Todo Listesi</h1>
      <TodoList todos={todos} />  // Client bileşene geçir
    </div>
  );
}- What does it do? It fetches the data server-side and passes it to the client. Use cache tags for fast loading.
2. TodoList Component (TodoList.tsx - Client Component):
'use client';
import { useOptimistic, useRef } from 'react';
import { createNewTask } from '@/utils';

export default function TodoList({ todos }: { todos: Todo[] }) {
  const [optimisticTodos, addOptimisticTodo] = useOptimistic(
    todos,  // Başlangıç: Sunucu verisi
    (state, newTodo: Todo) => [...state, newTodo]  // İyimser: Listeye ekle
  );

  const formRef = useRef<HTMLFormElement>(null);

  const handleSubmit = async (formData: FormData) => {
    const content = formData.get('content') as string;
    const newTodo: Todo = { content, isCompleted: false };  // Yeni todo oluştur

    addOptimisticTodo(newTodo);  // UI'yi hemen güncelle (iyimser)

    try {
      await createNewTask(content);  // Sunucuya gönder
      formRef.current?.reset();  // Formu temizle
    } catch (error) {
      // Hata olursa useOptimistic otomatik rollback yapar
      console.error('Todo eklenemedi:', error);
    }
  };

  return (
    <div>
      <form action={handleSubmit} ref={formRef} className="mb-4 flex gap-2">
        <input name="content" placeholder="Yeni todo ekle" className="flex-1 p-2 border" />
        <button type="submit" className="px-4 py-2 bg-blue-500 text-white">Ekle</button>
      </form>
      <ul>
        {optimisticTodos.map((todo, idx) => (
          <li key={idx} className="p-2 border-b">{todo.content}</li>
        ))}
        {optimisticTodos.length === 0 && <p>Henüz todo yok.</p>}
      </ul>
    </div>
  );
}- What does it do?
- It initializes the list with useOptimistic.
- On form submit: it first adds the item to the UI (quick feedback), then sends it to the server.
- Error? It automatically reverts to the previous list. Success? The cache is refreshed with revalidateTag.
3. Utils (utils.ts - API Operations):
const API_URL = '/api/todos';

export async function getTodos() {
  const res = await fetch(API_URL, {
    next: { tags: ['todos'] }  // Cache tag'i
  });
  return res.json();
}

export async function createNewTask(content: string) {
  const res = await fetch(API_URL, {
    method: 'POST',
    body: JSON.stringify({ content }),
    headers: { 'Content-Type': 'application/json' }
  });
  if (!res.ok) throw new Error('Hata');
  revalidateTag('todos');  // Cache'i yenile, UI'yi güncelle
  return res.json();
}
What does it do? It fetches/posts data with fetch. revalidateTag keeps the server data fresh and syncs it with the optimistic update.
Wrap-Up and Tips
With this setup, your todo app becomes instantly responsive: the user adds an item, the UI shows it right away, and the server either confirms it or it gets rolled back. To try it out, set up Next.js 14+ and add the React 19 canary.
Leave a comment
Your email address will not be published. Required fields are marked *